How to Get Strong in Banana Monkey Destruction
Spend bananas on the right stats — scale punch power, income, and size without wasting early currency.
Getting strong in +1 Banana Monkey Destruction means turning bananas into stats that let you break tougher city objects, earn faster, and grow into the world-destruction fantasy Kaboom Creations advertises on Roblox. Power is not one number — it is how punch damage, banana multipliers, movement, pickup range, and size interact. This guide gives a practical spending framework when official upgrade tables are incomplete, links to measurement in banana farming, and points to the upgrade priority tier list for ordering decisions when two buys cost similar amounts.
New players should skim getting started first. Strength without income measurement leads to overbuilt damage on props that already die in one hit.
Define “strong” at your stage
Strength is stage-relative:
- Early game: You one-shot starter objects and afford the next upgrade within a few minutes of banana farming.
- Mid game: You clear new districts without timer stalls, and your one-minute income rises after each major purchase.
- Late game (publicly aspirational): You punch through large map segments tied to “destroy the world” marketing — exact milestones are not documented in August 2026 public materials.
Chase the next stage definition, not abstract max stats on paper.
Core stat categories (UI-dependent)
Kaboom Creations has not published a complete external upgrade encyclopedia. Labels in your shop may rename during patches. Most Roblox punch incrementals include variations of:
Punch power / damage
Increases hit strength. Fixes slow clears when objects absorb many punches. First priority when timers feel boring.
Attack speed
Raises hits per second. Strong when damage is adequate but downtime between swings feels long. Watch Roblox performance on low-end mobile before maxing speed — frame drops hurt real DPS.
Banana multiplier / income
Boosts currency per break. Buy when objects die quickly but upgrades still feel expensive — your bottleneck is economy, not damage.
Move speed
Shrinks travel between clusters. Underrated early if you spend more time walking than punching on your farm route.
Pickup radius / magnet
Collects drops automatically. Prevents lost income when bananas scatter outside your path.
Size / growth
Unlocks visual scale and often gates tougher props. Buy when starter zones stop increasing your per-minute test despite damage upgrades.
Screenshot your shop when labels differ from this list — your client is authoritative.
Early-game priority framework
Use this decision tree before each purchase:
- If objects survive your full punch combo → damage or attack speed
- If objects die fast but income is low → banana multiplier
- If bananas sit uncollected → pickup radius
- If route has long empty walks → move speed
- If same zone pays tiny amounts at high damage → size / next zone unlock
After buying, rerun the sixty-second test from banana farming. Strong accounts show higher per-minute numbers, not just bigger numbers on one stat line.
Sample early session spend path
Illustrative only — costs and names change in patches:
- First purchase: punch power to reduce hit count on nearest crates
- Second: banana multiplier to fund the third buy faster
- Third: move speed or pickup depending on which wastes more time in your test
- Fourth: revisit damage if new zone targets appear
Cross-check with the upgrade priority tier list before deviating — it ranks common incremental patterns for Banana Monkey Destruction specifically.
Growth vs raw damage
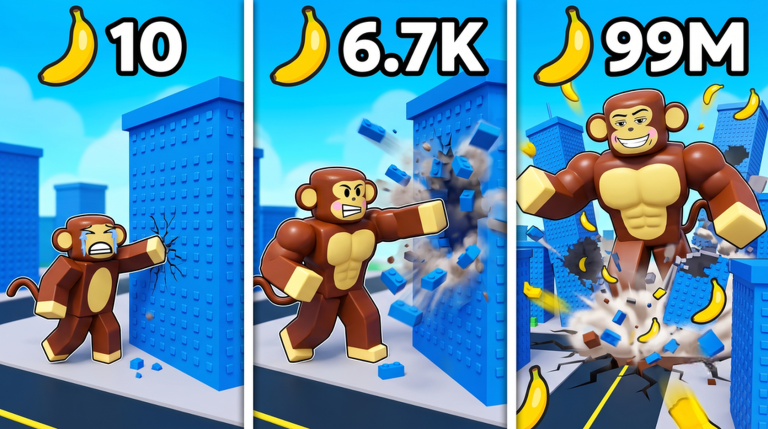
The official description ties bananas to getting bigger and stronger simultaneously. Size is marketing and mechanics: larger monkeys often access larger destruction targets with better payouts. Investing only in size without income can leave you punching flashy giants that still earn starter rates.
Rule of thumb: advance size when damage per second plateaus and a higher-tier zone is visible but pays more per object. Otherwise feed multipliers first.
Daily trainer synergy
Claim the daily trainer before power-testing sessions when possible. Temporary boosts inflate punch stats — useful for pushing a zone, dangerous for permanent upgrade decisions if you forget the buff ended. Measure baseline strength without buffs when comparing two expensive upgrades.
Trainer lump-sum bananas should fund the next planned purchase on your tier list, not random low-tier stats.
When to push new zones
Move outward when:
- Starter objects die instantly
- Per-minute income flatlines for two consecutive upgrades
- You can break at least one object in the next zone without emptying your entire session timer
Retreat when:
- Time-to-kill exceeds payout gain versus staying in the previous zone
- You lack pickup range to collect drops safely
- Server lag makes high-HP targets impractical
Multiplayer considerations
Online servers share destructible props. Strength feels inconsistent when other monkeys steal last hits. Personal stats still matter — you keep upgrades account-wide. Benchmark solo-style routes on quieter servers when judging whether an upgrade worked.
Codes, store purchases, and scripts
No verified codes exist August 2026. Roblox store items may sell boosts or cosmetics; read descriptions carefully and never assume pay-only power is required for progression — incrementals usually remain completable F2P with time.
Scripts advertising infinite bananas or destruction multipliers are unofficial and risky. They do not teach real stat priority and can trigger enforcement.
Planning tools
Use the banana calculator to translate upgrade costs into minutes of farming at your measured rate. Compare before-and-after tests when debating two stats at similar prices — the calculator does not know hidden formulas, but time cost is honest.
Patch discipline
Kaboom Creations warns the game is still new. After updates, revalidate your priority order. Nerfs to early damage or buffs to multipliers can flip the decision tree overnight.
Mental model for long-term power
Think in compounding layers:
- Layer 1: Punch objects (skill + placement)
- Layer 2: Collect bananas efficiently (route + pickup)
- Layer 3: Permanent stats (this guide)
- Layer 4: Daily systems (daily trainer)
- Layer 5: Future codes and events (codes hub)
Skipping layers creates the feeling of being weak despite “high level.” Fill the lowest missing layer before blaming bad luck.
Related reading
- Getting started — first purchases and UI tour
- Banana farming — income measurement
- Daily trainer — free daily power layer
- Upgrade priority tier list — detailed ordering
- Banana calculator — time-to-upgrade planning
Strong monkeys punch with purpose: buy the stat that fixes your measured bottleneck, expand zones when income stalls, and compound free daily rewards. That is how you grow from street-level troublemaker toward the world-scale destruction the official page promises — without fake stat tables or invented shortcuts.
Frequently Asked Questions
Quick answers to the most common questions.
What is the best first upgrade in Banana Monkey Destruction?
Usually punch power or damage so starter objects break faster. If you already one-shot targets, pick banana multiplier instead. Confirm with a one-minute farm test after each buy.
Should I focus on size or damage?
Focus damage and income until starter zones feel trivial, then invest in size to unlock higher-paying targets. Size without income often looks impressive but progresses slowly.
How do I know an upgrade was worth it?
Rerun your bananas-per-minute test from the farming guide. Worthwhile upgrades raise that number or cut time-to-kill on your current route.
Are paid Roblox items required to get strong?
The core loop is free-to-play punching and upgrading. Store items may speed progress but are not documented here as mandatory. Read each product description before spending Robux.
Where is the full stat list?
Kaboom Creations has not published a complete external stat encyclopedia as of August 2026. Use in-game shop labels and the upgrade priority tier list for planning.