Banana Monkey Destruction Upgrade Priority Tier List
Spend bananas where they compound fastest: income first, punch scaling second, size when the map demands it.
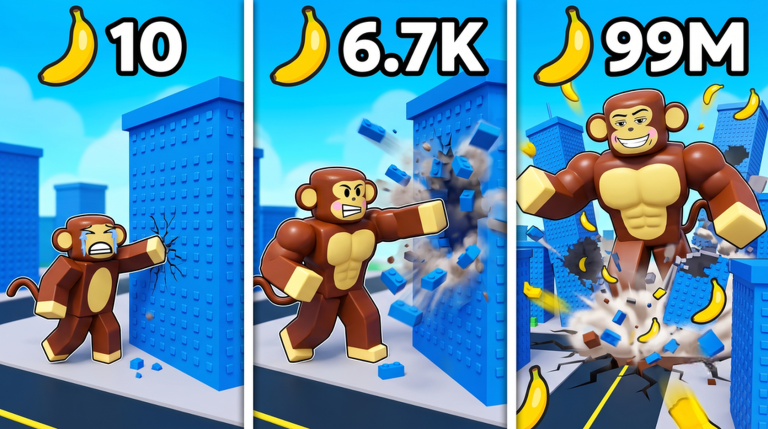
Every banana in +1 Banana Monkey Destruction is a decision. Kaboom Creations designed the loop so punch income, multipliers, and destruction throughput all compete for the same wallet early on. This upgrade priority list ranks which stats to buy first, what to delay, and when visual growth becomes mandatory instead of cosmetic.
Rankings assume free-to-play progression with the daily free trainer claimed whenever you play a serious session. Trainer buffs can temporarily elevate lower-tier purchases; we note those synergies inline. For phase-specific ordering during your first hour, also read Early Game Tier List.
Ranking criteria
| Tier | Meaning |
|---|---|
| S | Buy ASAP whenever affordable—defines your bananas per minute |
| A | Strong next purchase after S-tier caps or soft caps |
| B | Situational—good when map gates block you, not before income stabilizes |
| C | Luxury or vanity pacing—fun but poor return early |
| D | Delay until mid/late incremental layers or confirmed rebirth bonuses |
Validate any borderline call with the Banana Calculator using identical one-minute punch windows.
S-tier: Banana income multipliers
Why S: Incremental games are won by compound growth. Anything that multiplies bananas per punch—or per object destroyed—pays for every future upgrade faster than flat punch damage alone early on.
Buy when: You can afford the next tier without zeroing your wallet. Leave a small buffer for map transitions if you know the next zone threshold.
Trainer synergy: High. Income multipliers stack multiplicatively with trainer bonuses in most incremental layouts; claim trainer before benchmarking.
Common mistake: Skipping multiplier tiers because punch damage numbers look bigger on the UI.
S-tier: Core punch power (early tiers)
Why S: You cannot collect bananas you cannot access. Baseline punch power ensures objects in your current world zone break before your session ends.
Buy when: Destruction slows noticeably—time-to-break climbs while you stand on valid targets.
Stop temporarily when: Banana income multipliers are multiple tiers behind. Punch without income is a treadmill.
Cross-reference Upgrades for how punch interacts with object health tables.
A-tier: Auto punch / passive swing upgrades
Why A: Quality-of-life that also raises effective bananas per minute if you punch manually with gaps. Not always a separate shop line in early builds—when present, it belongs here.
Buy when: Income and baseline punch are stable for your zone.
Note: External scripts advertising Auto Punch claim similar outcomes but carry account risk—see Scripts Hub before using executors.
A-tier: Critical / bonus proc stats
Why A: Random bonus bananas spike averages upward. Excellent after multipliers exist to amplify proc payouts.
Buy when: Your measured banana rate plateaus with only linear upgrades.
B-tier: Size and reach growth
Why B, not S: Size feels impactful because the avatar grows, yet oversized monkeys with weak income punch the same objects slowly—just with better screenshots.
Buy when:
- Map objects require minimum size or reach to interact.
- You have S-tier income and punch reasonably caught up.
- Destruction radius gates the next layer in World Destruction.
Delay when: Your Early Game income tier is still B or C relative to zone requirements.
B-tier: Destruction radius / splash
Why B: Converts one punch into multiple breaks if object clusters are dense. Value depends on map layout; excellent in city zones, weaker in sparse areas.
Test method: Compare one-minute totals in your usual farming spot before and after one radius tier.
C-tier: Movement speed (non-gated)
Why C: Faster walking between targets helps, but does not multiply bananas unless distances are enormous. Mobile players may bump this to B for comfort.
C-tier: Cosmetic or flex purchases
Why C: Enjoyment matters in Roblox, yet flex items rarely affect incremental math. Buy after S-tier income is autopilot-stable.
D-tier: Premature rebirth investments
Why D: Rebirth systems in young incrementals change often. Unless a rebirth tier shows verified permanent multipliers with clear ROI, treat rebirth currency dumps as speculative.
Watch Updates Hub for rebirth reworks before committing long grinds.
Sample priority route (first serious session)
- Claim daily free trainer.
- Buy lowest affordable banana multiplier tier.
- Raise punch power until current-zone objects break in one to three hits.
- Alternate multiplier and punch until banana rate doubles baseline.
- Buy size only when the map visibly blocks progress.
- Add radius if cluster farming spot is stable.
- Re-test with Banana Calculator.
When this list changes
Kaboom Creations patches can rebalance trainer percentages, object health, or shop costs. Revisit after each update note. If public codes ever release, they may shift pacing without changing relative priority—codes multiply starting resources, not the order of efficient stats.
Related pages
- Early Game Tier List — timeboxed first-hour order
- Upgrades system — stat definitions
- Bananas — currency behavior
- Tier List Hub — all rankings in one place
Frequently Asked Questions
Quick answers to the most common questions.
Should I always follow S-tier purchases strictly?
Use S-tier as default. Break the rule only when the map hard-gates size or reach—then buy the minimum size tier required and return to income.
Does the daily trainer change upgrade order?
It boosts short-term income, which makes multiplier purchases pay off faster during buff windows. Long-term priority stays the same.
Why is size not S-tier if destruction is the game name?
Destruction requires breaking objects, which requires punch throughput funded by bananas. Size without income is mostly visual until the map demands it.
How do I prove an upgrade was worth it?
Run identical one-minute punch tests before and after purchase using the Banana Calculator. Priority tiers are hypotheses; your data confirms them.