Banana Monkey Destruction Leveling Guide: 0 to 150
Fastest progression paths for Banana Monkey Destruction — punch rhythm, upgrade timing, and honest benchmarks without invented XP tables.
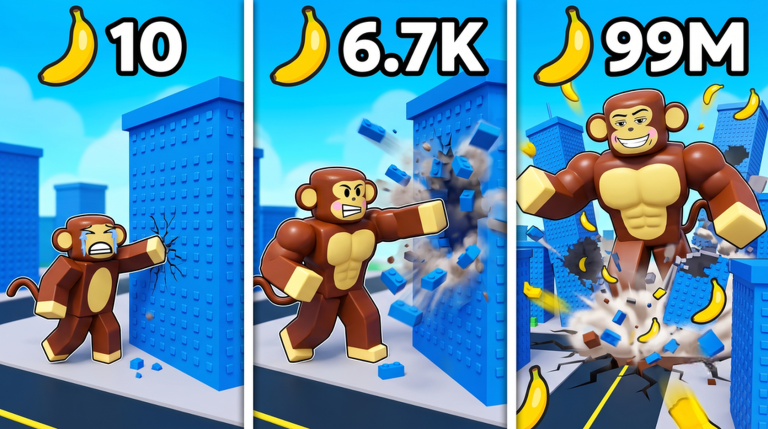
Leveling in +1 Banana Monkey Destruction is the visible counter on your account that tracks how far you have pushed the punch-and-upgrade loop. Kaboom Creations does not publish a complete external level chart, but community gameplay and walkthrough footage commonly reference progression from Level 0 through Level 150 as a practical mid-to-late milestone before deeper world-destruction goals. This guide explains how to level fast without guessing hidden formulas, how leveling relates to bananas and stats, and where to cross-check spending with get strong, banana farming, and the upgrade priority tier list.
If you have never punched your first crate, start with getting started. Leveling advice assumes you already understand collect-upgrade-repeat rhythm.
What leveling actually measures
In most Roblox incrementals, “level” blends two ideas:
- Account level — a number that rises as you earn experience from breaking objects, completing milestones, or spending bananas on certain upgrades.
- Power level — how fast you clear zones, which may lag behind the number on screen if upgrades are misordered.
Banana Monkey Destruction ties progression to punching destructibles and spending bananas. Your level rises when income and damage keep pace with whatever XP thresholds the live build uses. Because Kaboom Creations has not published exact XP-per-punch values, treat leveling as an outcome of efficient farming, not a separate grind you chase in isolation.
Run the one-minute bananas-per-minute test from banana farming after every major purchase. If BPM rises but level gains feel slow, you may be punching low-tier props. If level rises but BPM flatlines, you may be earning XP without funding the next upgrade — both problems have different fixes.
Fastest punch loop for early levels (0–30)
Early levels reward density over spectacle. Starter districts pack many low-health objects into small areas, which means more break events per minute and faster level ticks.
Session template
- Claim the daily trainer on login when available.
- Pick the tightest cluster you can clear without long walks.
- Punch continuously for sixty seconds; record bananas and note whether your level bar moved meaningfully.
- Spend bananas on the bottleneck stat from get strong — usually punch power or banana multiplier first.
- Repeat until upgrades cost more than two minutes of farming at your measured rate.
Avoid wandering into dramatic skyline zones early. They look like progress on a thumbnail but often pay fewer XP events per minute until your damage catches up.
Mid levels (30–80): upgrade pacing
Mid progression is where players stall by buying the wrong stat or over-investing in size before income scales. Use this pacing framework:
| Symptom | Likely fix | Wiki cross-check |
|---|---|---|
| Objects take many punches | Punch power or attack speed | Upgrade priority |
| Objects die fast, upgrades feel expensive | Banana multiplier | Banana farming |
| Bananas scatter off your path | Pickup radius | Get strong |
| Same zone, slower level gains | Move to higher-tier cluster | World destruction |
Buy upgrades in chunks — farm until the next tier is one or two minutes away, purchase, immediately rerun the minute test. Leveling speed correlates with how often your per-minute income jumps, not with how long you stare at a full banana bar.
Plug your BPM into the banana calculator when debating two similarly priced stats. The calculator does not know secret level formulas, but it honestely compares time-to-afford, which keeps your punch loop funded.
Late levels (80–150): zone pushes and gates
Approaching Level 150 usually means hitting size gates and punch thresholds on tougher city blocks. Symptoms include punches connecting visually but objects barely moving, or new districts paying well yet requiring multiple sessions to afford entry upgrades.
Push outward when:
- Your current cluster dies in one to three hits consistently.
- BPM flatlined across two consecutive purchases.
- You can break at least one object in the next zone without exhausting an entire session timer.
Hold and farm current zones when:
- Time-to-kill exceeds payout gains versus staying put.
- Server competition clears props faster than you can level (world destruction etiquette applies).
- A patch note on updates suggests economy retuning — remeasure before burning bananas.
Level 150 is a community milestone, not an official finish line. Kaboom Creations may extend caps in future patches. Treat 150 as a checkpoint to evaluate rebirth discussions and long-term destruction goals, not as permission to stop measuring BPM.
Multiplayer impact on leveling speed
Servers hold up to eight players sharing destructible props. Your account level is yours alone, but shared objects mean fewer break events per minute when crowds punch the same strip.
Level efficiently on busy servers by rotating secondary routes documented in banana farming and how to destroy. Benchmark on quieter instances when judging whether an upgrade actually accelerated leveling.
Events and listing changes
The Roblox listing briefly showed an [X2] title prefix after an August 2026 update. That branding may signal a limited boost window — see X2 event notes for how to compare BPM with and without active event indicators. Do not assume double XP without testing; measure level gain per ten-minute block instead of trusting menu text alone.
Codes, scripts, and legit shortcuts
No verified codes exist as of August 2026. Scripts advertising instant levels violate Roblox terms and teach nothing about stat priority. The punch aura pattern mimics legitimate radius upgrades at the cost of account risk — not recommended for leveling benchmarks you plan to trust.
Legitimate accelerators today: daily trainer, smart upgrade order, dense routes, and post-patch remeasurement.
Leveling checklist
- One-minute BPM logged at session start
- Daily trainer claimed before long farms
- Next purchase chosen from tier list, not random shop browsing
- Route rotated if competition thins props
- Zone push attempted only after BPM plateaus
- Updates hub checked after silent Roblox patches
Related pages
- Getting started — first-session fundamentals
- Banana farming — income measurement backbone
- Get strong — stat spending aligned with level gains
- Rebirth guide — when resets enter the conversation
- How to destroy — routing for higher-tier XP events
- Upgrade priority tier list — purchase order when choices collide
- Banana calculator — time-to-next-upgrade planning
Frequently Asked Questions
Quick answers to the most common questions.
What is the level cap in Banana Monkey Destruction?
Community footage often references progression toward Level 150, but Kaboom Creations has not published a permanent official cap. Expect changes during early access and remeasure after updates.
Does leveling give free stat points automatically?
Level rewards depend on the live UI. Most incrementals still require spending bananas on shop upgrades. Level is a progress meter; stats come from purchases and systems like the daily trainer.
Why am I leveling slowly despite high damage?
You may be one-shotting low-tier props that grant less experience per minute. Push to the destruction front described in the world system page or improve banana multiplier so you can afford zone-entry upgrades faster.
Should I rebirth to level faster?
Only if rebirth bonuses are confirmed valuable on your account. Read the rebirth guide for honest uncertainty while UI stabilizes — premature resets can slow leveling dramatically.
How do I track leveling speed objectively?
Note your level at the start and end of a ten-minute farm using the same route. Compare sessions after upgrades instead of relying on memory or third-party claims.